Summary: This guide explains the feature that allows you to send 2 way push notifications that your members can reply to, creating a direct line of communication. We will walk you through enabling replies on a new notification and selecting which Church App Admins will receive the responses.
Before You Begin
- You must be an Admin with permissions to send notifications.
- You must have one or more users designated as Church App Admins. These are the only users who can receive replies. It's important to note this list does not include all general admins on your account; it is specific to those with admin access to the Church App dashboard. For example, an admin in Breeze who does not have Church App permissions would not appear on this list.
Step-by-Step Instructions
Step 1: Start a New Notification and Select Groups
Navigate to your dashboard and click the Create New Notification quick action, or go to the Push Notifications tab and click Add New. In the modal that appears, choose which notification groups will receive the message.
Step 2: Enable Replies
Locate the new toggle switch labeled Allow members to send replies to this notification and click it to the 'On' position.
Step 3: Select Admins to Receive Replies
A new section, "Send replies to," will appear. Click the +Add Admins button.
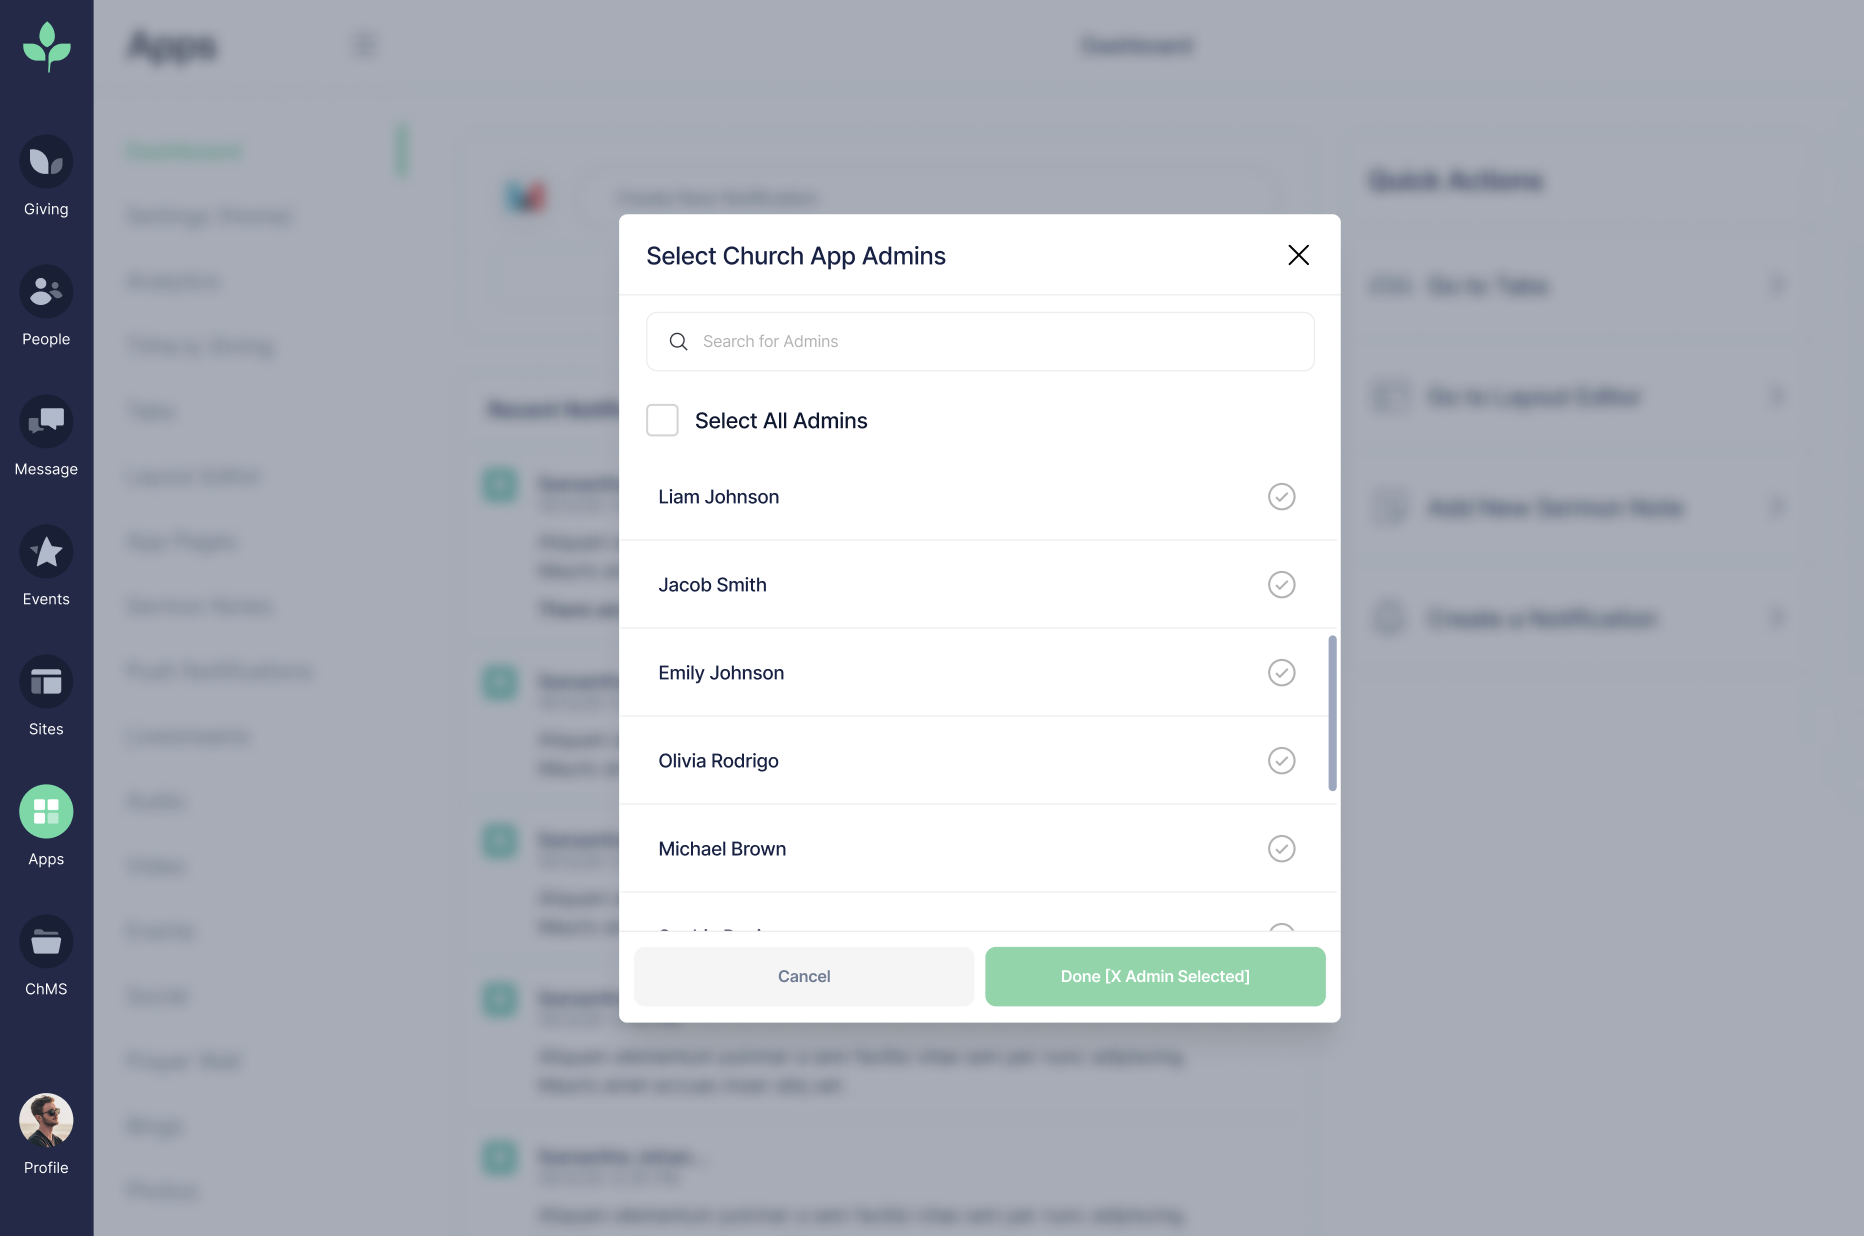
Step 4: Choose Admins from the List
A "Select church app admins" window will open. You have several options:
- Select an Individual: Click the checkbox next to the name of each admin you want to receive replies. A green checkmark will indicate your selection.
- Select All: Click the Select all admins button to choose everyone on the list. The copy will change to Deselect All Admins.
- Click Done to confirm your selection. (Clicking 'Cancel' or the 'X' will close the window without saving your choices).
Step 5: Manage Selected Admins
After clicking 'Done,' the "Send replies to" section will update to show your selection, either with a label for All Admins or by listing individual names.
- You can remove an individual admin by clicking the 'X' next to their name.
- You can return to the full list to make changes by clicking the Edit button.

Step 6: Compose and Send Your Notification
Fill in the Title and Message fields as you normally would. You can also add a photo from your media library or personal device. Finally, you can schedule the notification to be sent at a later time or click Send Notification to deliver it immediately.
Error States
If you have toggled "Allow replies" but have not selected any admins, the system will prevent you from sending the notification. An error message will appear stating, "Select admins to send replies to." You must select at least one admin before you can proceed.
Frequently Asked Questions
- Who is on the list of admins I can select? The list only includes users who have been specifically designated as Church App Admins. General admins or users with other roles will not appear on this list.