Summary: This article explores the features accessible through the Admin Batch Giving page, including viewing, filtering, committing batches, and resolving unmatched entries. It also covers how to seamlessly jump from a transaction to its original batch, plus new keyboard navigation shortcuts for faster data entry.
Before You Begin
Permissions: You must have Admin or Account Owner permissions to access Admin Batch Giving.
Commit Warning: Once a batch is Committed, you cannot add or remove entries, change the batch name, or change the location. Ensure all data is correct before finalizing.
Status Definitions:
Uncommitted: Editable; not yet processed.
Committed: Finalized; transactions are processed.
Pending/Partially Successful: Processing in progress or requires attention.
Step-by-Step Instructions
Navigating to a Batch from Transactions (New!)
If you need to adjust fund splitting or edit an entry created in Admin Batch Giving, you can now jump directly to it from your main transactions list.
Navigate to Giving > Transactions.
Filter or Search for the specific entry (e.g., filter by "Check").
Click on the Transaction to open its details panel.
Click the View Batch button. This will open a new browser tab and take you directly to that specific transaction opened inside its original Admin Batch Giving batch.
Make your Edits (such as adjusting fund splits) right there in the panel.
Close the Browser Tab. Since it opened in a new tab, simply click the 'X' on your browser tab to return exactly where you left off in your Transactions list without losing your place.
Viewing and Filtering Batches
Navigate to Giving > Admin Batch Giving. You will land on the main Batches page.
Filter your view (Optional). Use the filters to sort by Location, Date, or Status. You can select multiple filters simultaneously.
Review Batch Data.
# of Entries: Total transaction entries in the batch.
Batch Name: Generated upon creation (cannot be edited after committing).
Date: Date the batch was opened (cannot be changed).
Location: Associated campus/location (cannot be changed once created).
Batch Amount: Total sum of transactions in the batch.
Status: Current state (Uncommitted, Committed, Pending, etc.).
Committing a Batch
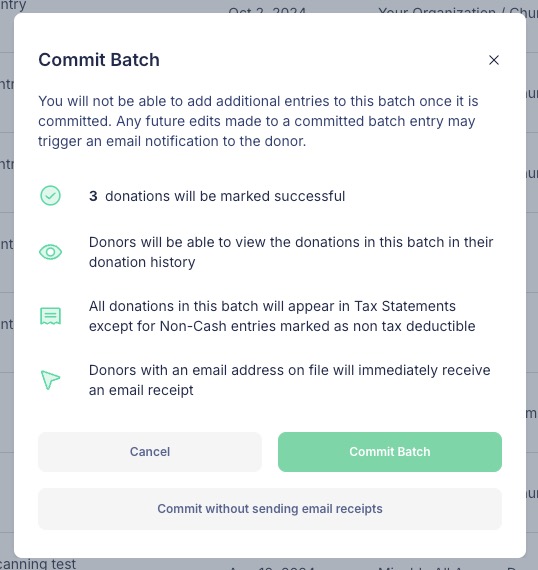
Locate an Uncommitted batch.
Click the ellipses (...) to the right of the batch row.
Select Commit Batch. (Note: Make any necessary edits to transactions before this step.)
Choose your Receipt Option. A notice will appear confirming the batch will lock. Proceed by selecting either Commit Batch (Sends email receipts) or Commit without sending email receipts.
Managing Unmatched Entries
If a donation was recorded with "Unable to Choose Donor," it becomes an Unmatched Entry.
Click Unmatched Entries in the top-right corner.
Select a donation from the list.
Type the donor's name in the Add a Donor field on the right-hand panel.
Click Update.
Select your next action. A modal will ask if you want to email the donor, view the batch, or exit to continue matching.
Keyboard Shortcuts & Accessibility Updates
To improve speed and accessibility for admins who prefer keyboard navigation over mouse clicking, the following updates have been made to the entry form:
Donor Selection Tabbing: You can now Tab into the Donor field, type a name, and continue hitting Tab to navigate through the dropdown results. Hit Enter to select the correct donor.
Gift Date Navigation: When you Tab to the Gift Date field:
Hit Enter to open the calendar picker.
Use the Arrow Keys to move through dates.
Hit Enter again to select the specific date.
Next Entry Loop: After entering all donation details, Tab to the Next Entry button and hit Enter.
The system will save the entry and automatically return focus to the Donor field. This allows you to immediately start typing the next donor's name without needing to click back into the field manually.
Troubleshooting & FAQs
Why don't I see the "View Batch" button on a transaction? The "View Batch" button only appears on transactions that were originally processed through Admin Batch Giving or Check Scanning. It will not appear on standard online donations.
Can I change the Location of a batch? No. Once a batch is created, the location is fixed. If the batch is Uncommitted, you can delete the batch and recreate it with the correct location. If it is Committed, the location cannot be changed.
Can I edit a batch after committing it? You cannot add or remove entries from a committed batch. However, using the new "View Batch" feature from the Transactions list, you can jump back into the batch to edit specific fields (like fund designation) on individual transactions.